In this article, we will be walking through the steps of cleaning a Fluval FX4 canister filter as I clean my own at home.
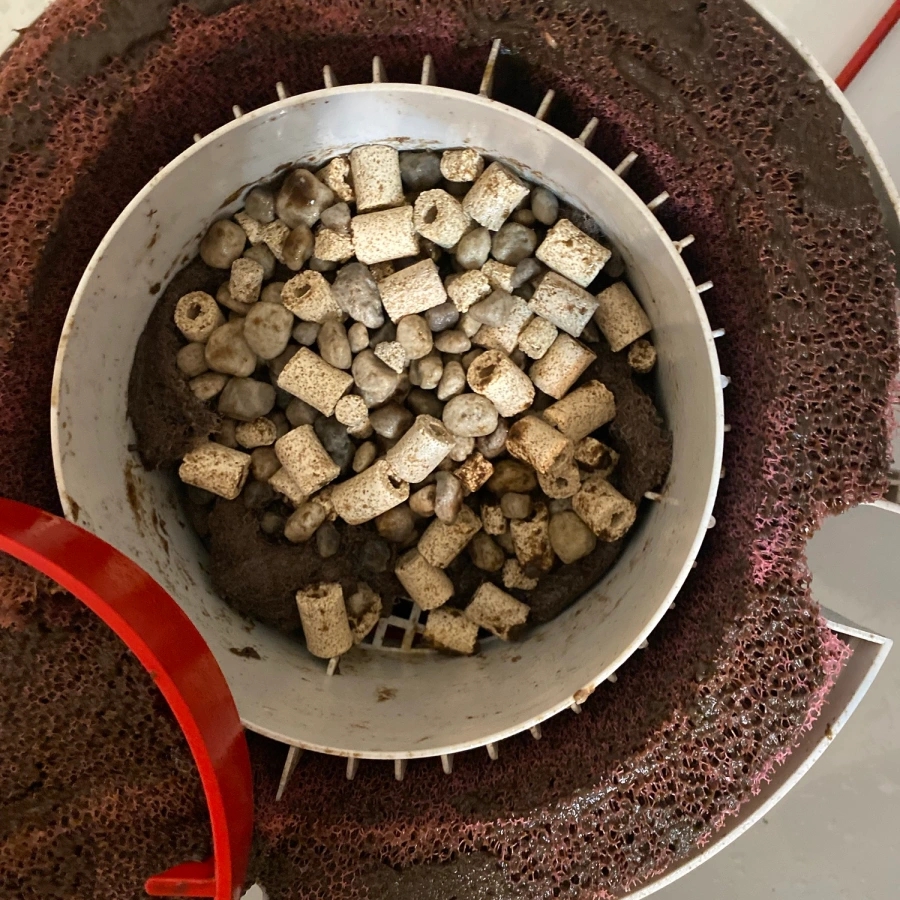
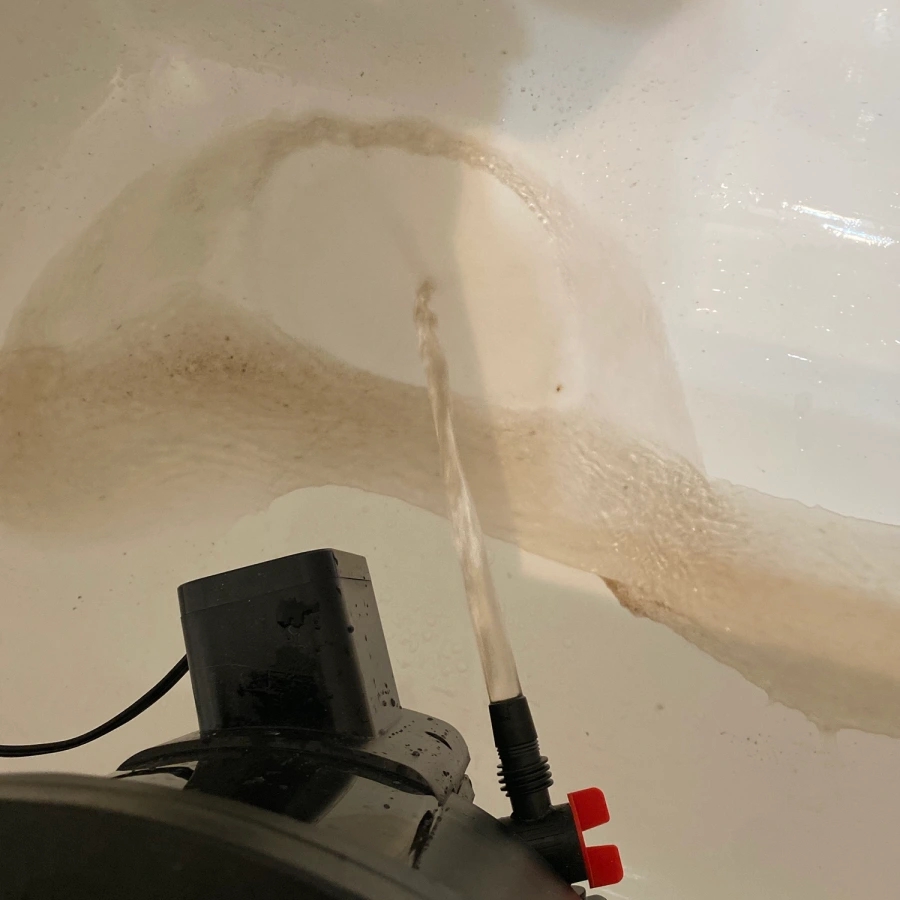
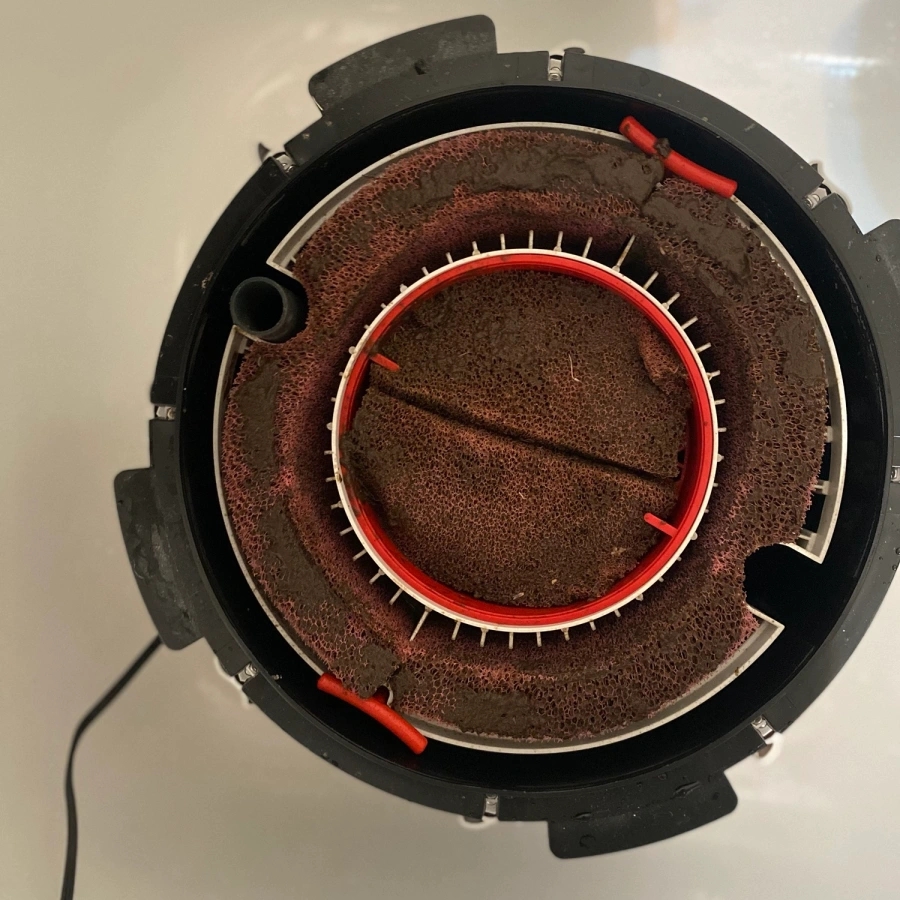
It has been about four years since the inside of my FX4 has seen the light of day, so you get to see what it looks like when you don’t clean your canister filter. It’s pretty nasty!
Cleaning Your FX4 Filter
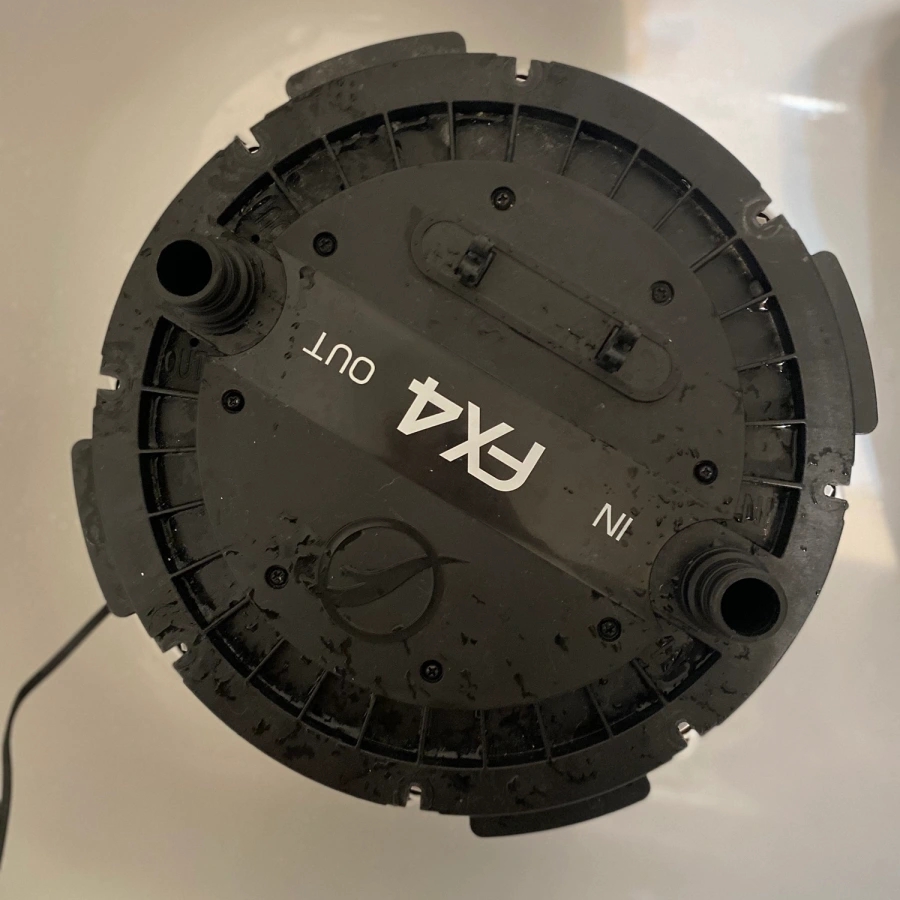
This filter is pretty darn heavy, weighing 14 pounds without water in it. So, if you are not very strong, this filter might not be the best choice for you. With that being said, it does have a plug at the bottom to empty the water from the bottom.
What You’ll Need:
- A bathtub, shower, or outdoor area
- A bucket
- Replacement media (optional)
- Water conditioner
Step One:
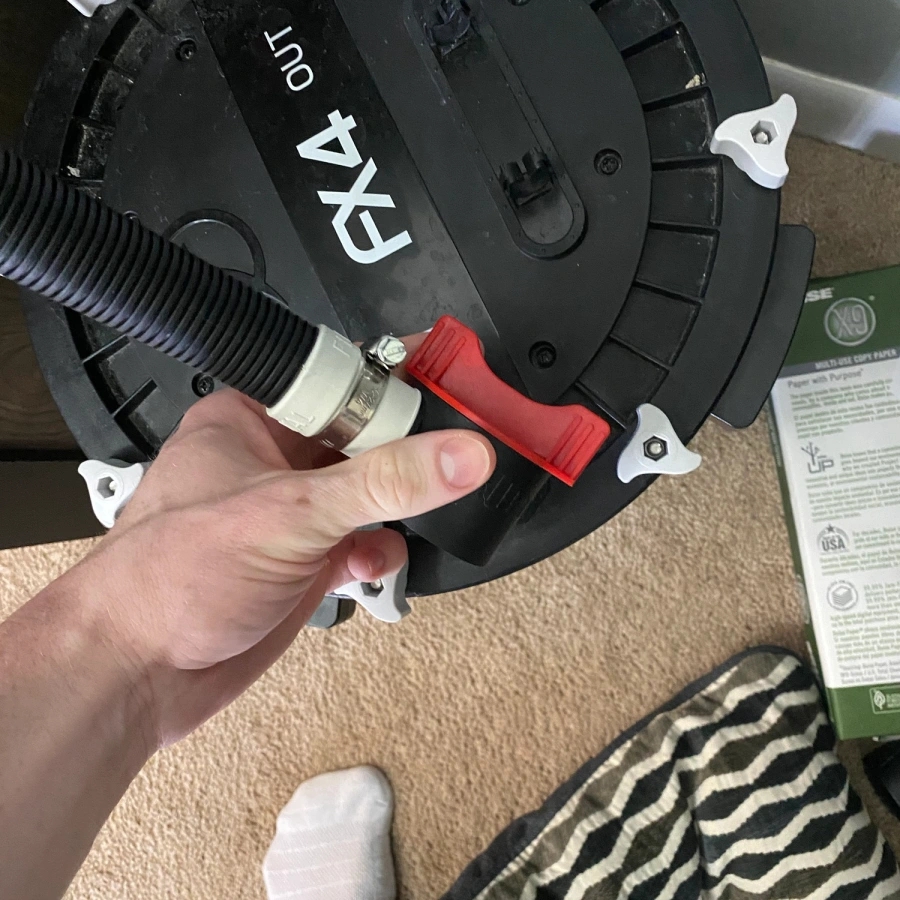
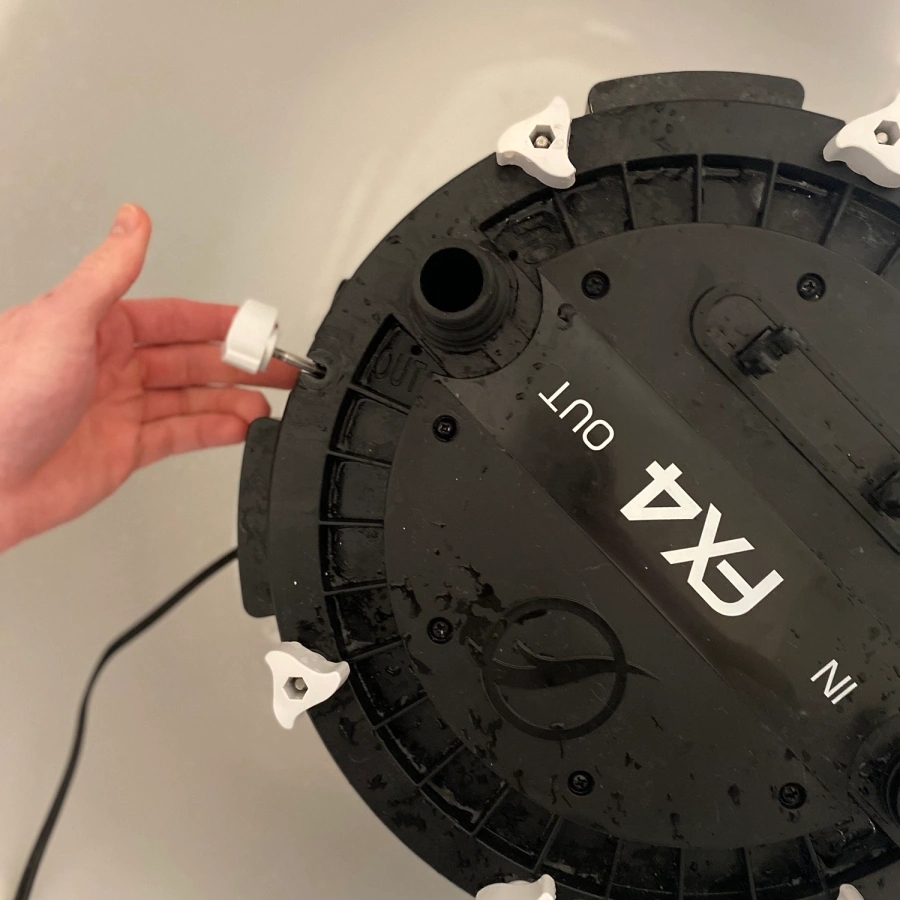
Turn the red valves on both sides of the hoses so they are closed and horizontal, and unplug the filter. Do NOT unscrew the metal O-ring.
Step Two:
Below the red level at the base of the hose, there is a red button. As you hold down this button, pull the base of the tubing and twist. Do this on both hoses to detach them.
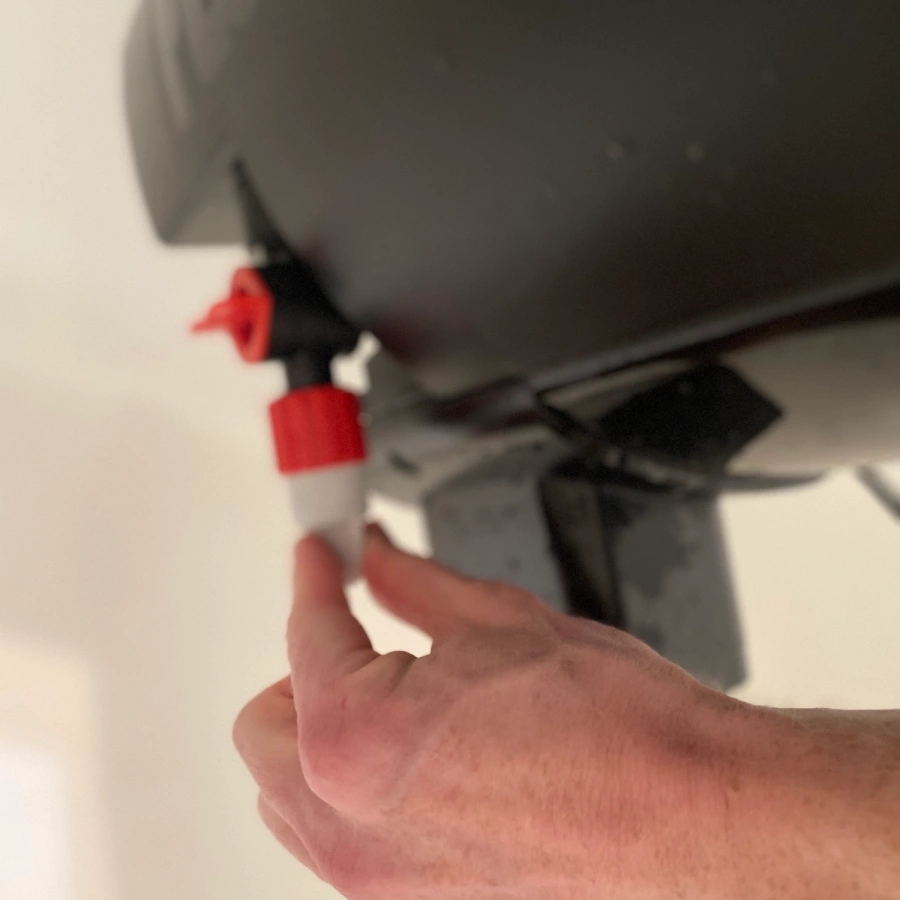
Step Three:
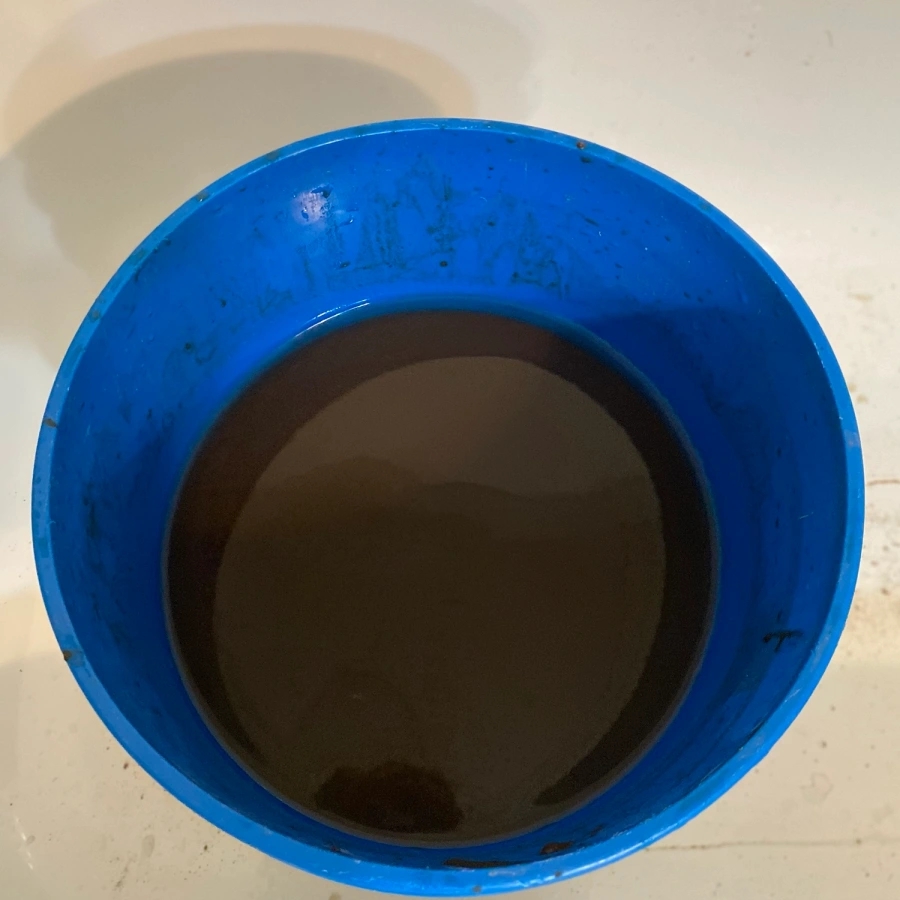
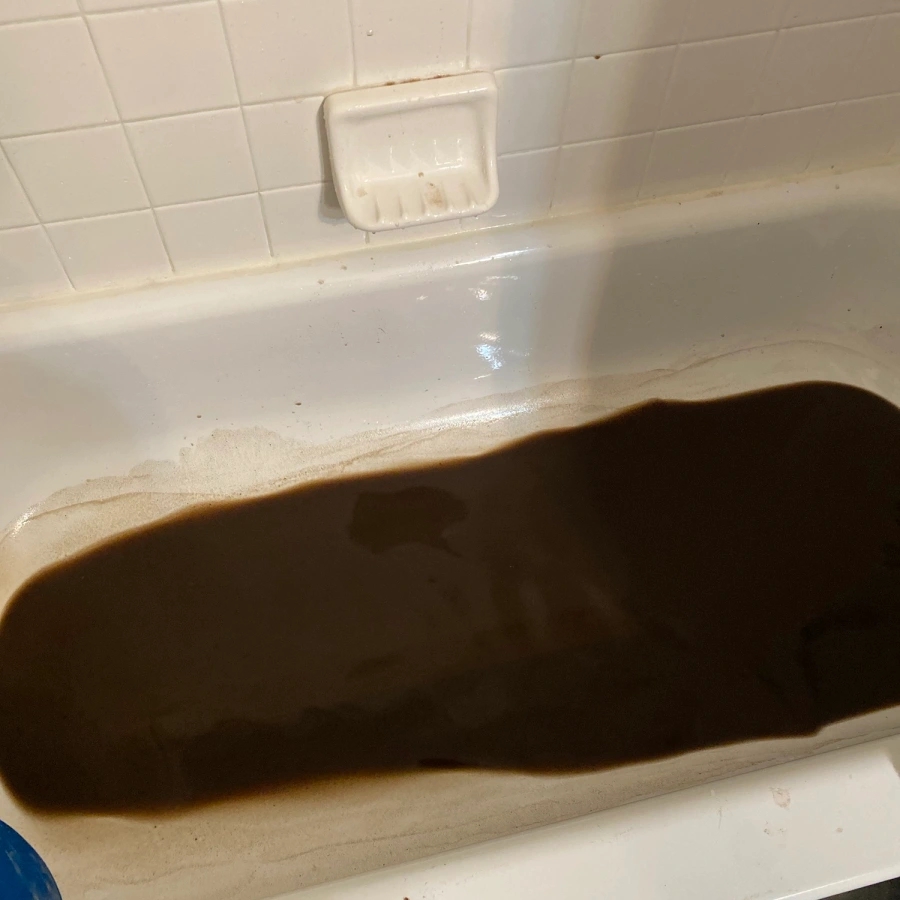
With your filter in an area where it can drain, take the cap off of the small outlet at the bottom and open the valve. This will drain the filter. Be sure to close the valve and cap it when it’s done draining.
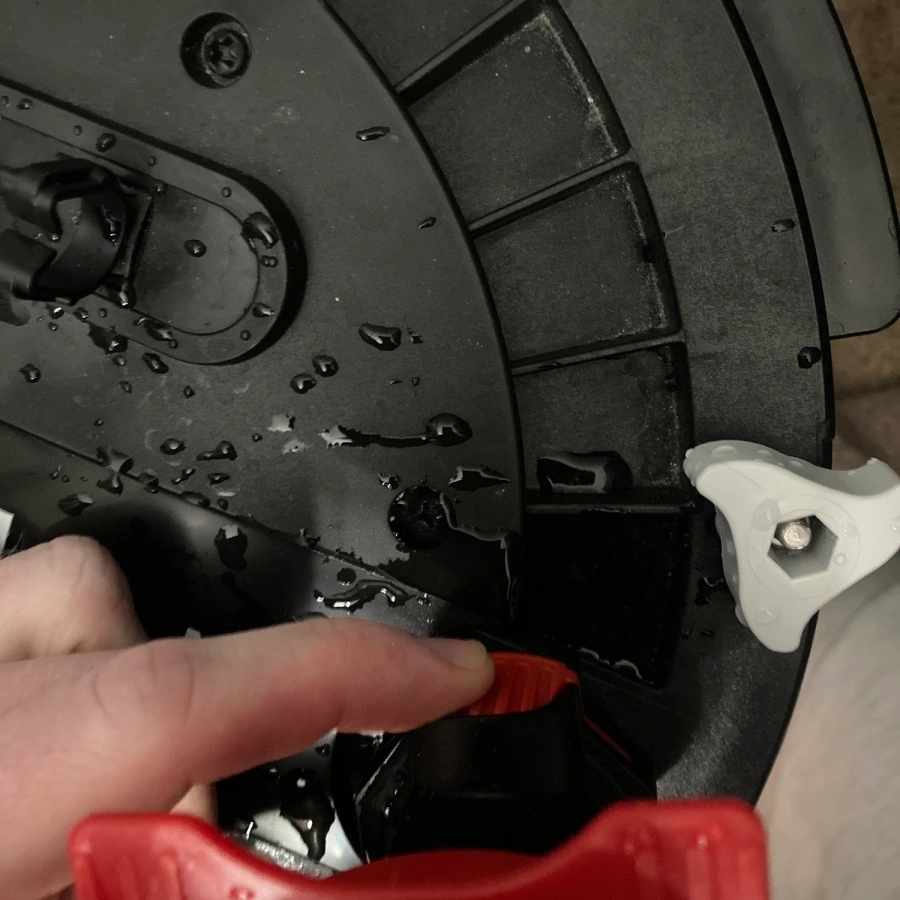
Step Four:
Untwist each screw by the white handles around the filter, and push them away from the filter, and remove the top of the filter.
Step Five:
Clean and replace.
If you have tap water with chlorine in it, this is where you’re going to want to use a bucket of either tank water or conditioned tap water.
Remove the media and clean it. Replace necessary media like charcoal or recharge Purigen. You never have to replace your ceramic or pumice bio-media, never. Ignore what any bio-media packaging might tell you. Doing so can destroy your entire cycle. Sponges rarely ever need replaced, a good cleaning will be fine.
The optimal order to have your filter media in is sponge or floss, then bio-media, like ceramic or pumice, and lastly, your chemical filtration like charcoal or Purigen. This order is from bottom to top.
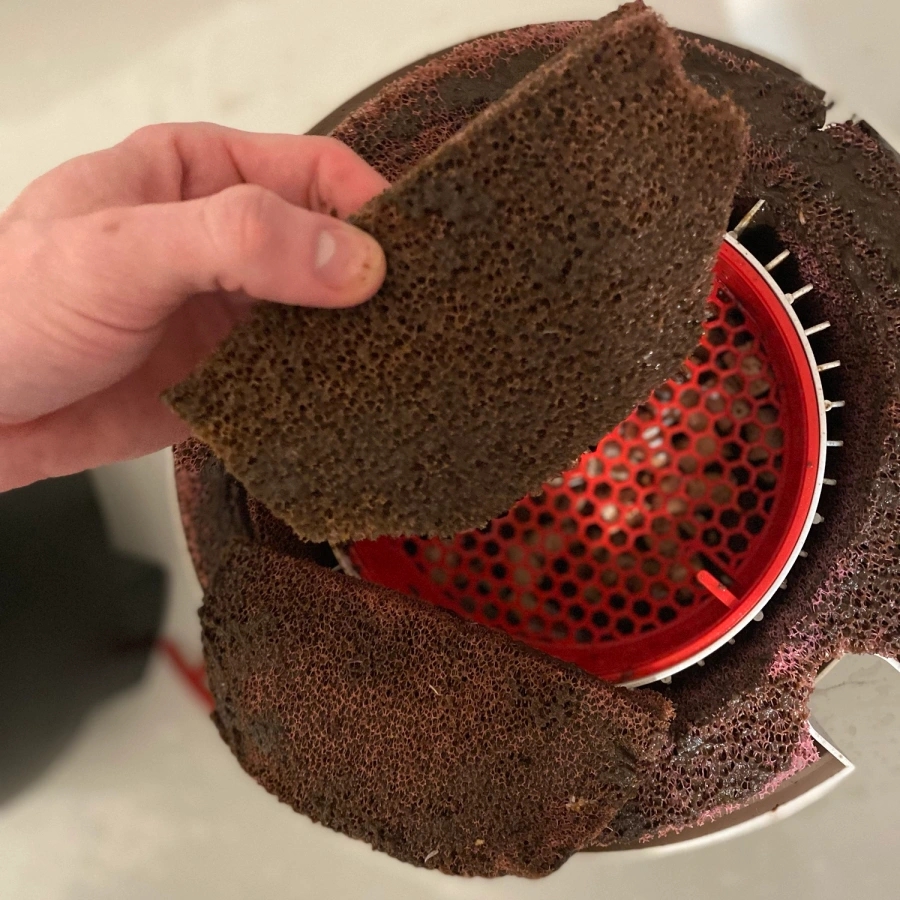

As a side note, try not to let your bio media dry out while you’re cleaning the rest of the filter.
Step Six:
Put it back together and secure your lid.
Step Seven:
Reattach your hoses to your filter, making sure everything is secured and closed properly. Open both intake and outlet valves. This will cause a lot of bubbles as the water fills up the canister. Wait until the bubbles stop and then plug in your filter.
Alternatively, you can partially fill the filter before putting the lid back on. If you go with this option, you can plug the filter in when you open the valves.
Funny noises and bubbles are perfectly normal as your filter fully primes itself.
At this point, you have successfully cleaned your Fluval FX4!